Phew! Now that Wednesday’s event is complete, I can link back and give some credit to tutorials, ideas, and blogs that helped us get there. As I mentioned in earlier posts, our goal was to create a craft fair display from mainly upcycled materials–with a rock bottom budget. Luckily, lots of astute crafters have been there before us and have been willing to share their wisdom and ideas, which we’ll link to here.
This was our original display. 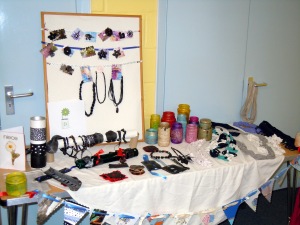 The group decided they wanted to add some shelf-type height, a mirror, proper necklace displays, leaflets, and make everything a uniform colour (blue). It was a pretty tall order on no budget!
Using the materials we had on hand, I started out by making shelves with a small set of drawers from an unused 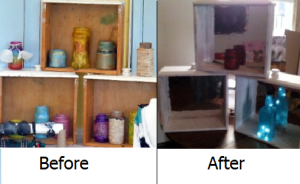 nightstand. A quick coat of spray paint and some mirrored contact paper was all these needed. The thing I love most about these is that you can tuck most of your display items away in the drawers and store them neatly for next time.
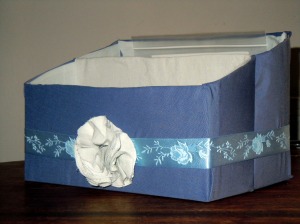 Next up, we needed something to hold leaflets and promotional materials, and I found what we needed on a blog by Katydid and Kid. She posted excellent instructions for making a stationary organizer from a cereal box! (Although hers was much nicer than ours, which was covered in scraps of fabric from a ruined shirt) It looks nice for a box of Fruit & Fibre!
For our jewellery displays, I searched far and wide for DIY tutorials on the net. Two of the main ideas I built on were a Necklace display tutorial by Stella and Hodge and a bracelet display instructable by CH3. I also wanted some peg boards with ribbon, like the hundreds you can find on Pinterest. The main materials I had to work with was packaging from Amazon–cardboard and stiff-rolled paper. To give everything a uniform finish, I picked up a super-value roll of textured wallpaper that would cover all the display materials. 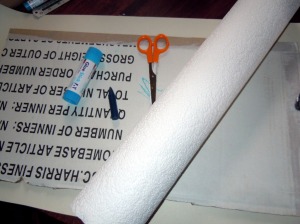 Last Wednesday, the group set to work cutting out the cardboard and covering it with wallpaper. Since they wanted it blue, I tried a couple of methods before settling on one that would work well with the vinyl wallpaper: Crayon. Just like leaf rubbings we used to do in school, the crayon picked up all the texture in the wallpaper for a really cool finish.
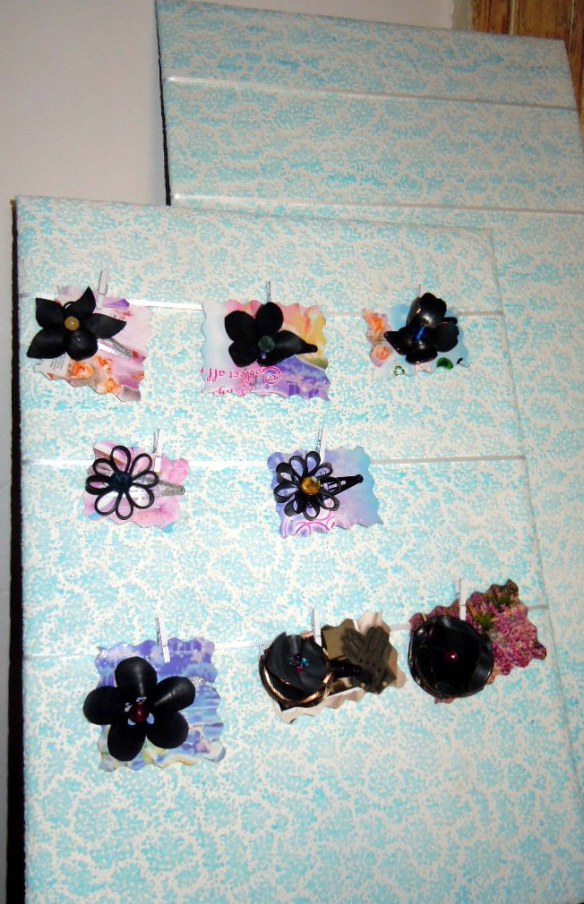 We attached ribbon to the boards with staples and reinforced with hot glue. In total, we made 3 boards, 5 necklace stands, and two bracelet rolls for less than £7, and managed to upcycle lots of waste materials in the process! I mentioned that we wanted a mirror for the display and although I’ve already posted photos, I’m going to do it again–I’m just that pleased with how it turned out!
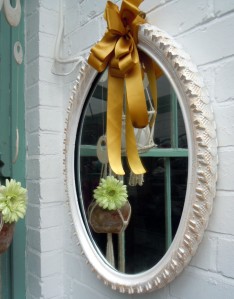 Since the event was an All-Ability Cycling Day, I wanted to stick with a bike theme. Luckily, I had a waste tire from the lovely people at OWL. In order to make the tire fit the mirror, a certain amount of surgery was needed. The rim of most bike tires is supported by several steel wires to maintain rigidity. These need to be exposed and cut through individually before the rest of the tire can be seperated. Then I hammered steel eyelets along each side of the join, and wove a thick cord through them corset-style to hold the mirror in place. The white and gold paint was an attempt at bike-meets-shabby-chic, which may have been a little too effective since most people didn’t actually notice there was a tire there at all. Ah, well.
The last thing we needed was some kind of upcycled packaging, in case people actually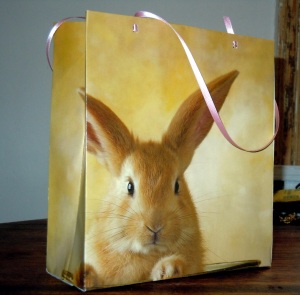 wanted to buy our stuff*. We found just what we needed for that here, at the I Do Have A Talent blog. Her tutorial for gift bags from calendars was perfect, since we’ve had several calendars donated to us over the past several months. The fact that it’s Easter, and we had a bunny calendar was an added bonus! The tutorial is so great and they came out so sweet that I see no reason a gift bag from a shop again!
So in a very large nutshell, that’s how we created an upcycled craft fair display on a minimal budget. Thanks to all of you crafters out there who provided inspiration! If you like any of the ideas we’ve posted, please do follow the links and check out the full tutorials–they’re great!
*Hooray–people really did want to buy our stuff and use our bunny bags!–Thanks to everybody who made purchases!

I really like how you did that mirror. Sounds like a bit of work, but it looks so good it was certainly worth it!
Thanks, I’m really pleased with it! I hope if I practice I’ll be able to streamline the process a bit and make lots more…
So many good ideas in this post! I really like the idea of turning old boxes into stationary holders. I’ve seen people use them as magazine stands, too, which I really ought to make use of.
And that bunny bag is absolutely adorable!
He is cute, isn’t he? By the time I finished with the calendar, I had bunnies stacked all over the place. (And they all seemed to be giving me that look of disapproval that only bunnies can do!)
Pingback: 13 Ways to Reuse Tires - Thrifty Ninja
Pingback: 13 Ways to Reuse Tires - Moxie Ninja
Pingback: Schmeiß deine alten Reifen nicht weg! 20 tolle Möglichkeiten zur weiteren Verwendung
Pingback: 20 Ways To Reuse Old Tires, From The Practical To The Darn Right Weird | Natural World Evolution
Pingback: She Glues Rope Onto An Old Tire To Create Something The Entire Family Would LOVE
Pingback: She Glues Rope On An Old Tire – Her Next Step Turns Into Something I Want To Have In My House! | Subfeed
Pingback: 22 Awesome Ways to Turn Old Tires Into Recycled Crafts
Pingback: Make Creative Furniture With those Old Tires | Tech & Art
Pingback: 21 Super Amazing Ways To Reuse Old Tires…That You Will Love - Thrillbites